Here I sit on a Friday afternoon with my feet up and my heart happy. I’m looking over the photos I barely had time to take during the Clay Every Day workshop that ran from 9-12 Monday through Friday this week. We had a lot of fun yet worked very hard. For the first 2 1/2 days we focused on hand building using slab techniques. Everyone made a drape bowl and an inset bowl, a textured mug, a clay hand, and a clay plaque. We went through 50 lbs. of clay on the first day alone! That’s a lot of clay for just seven hours or so! And throw in the random spontaneous dance party and well, you know…busy, busy!


During the second half of the third day we cleaned up all the clay tools and broke out the glaze and brushes. We painted manufactured bisque items while the hand built clay pieces had a chance to harden up a little bit. Each artist painted a plate and cup using a common theme and the next day continued the theme on their drape bowl. We all envisioned breakfast served with juice in the cup, toast on the plate, and cereal in the bowl. That was super motivational!


The next day, Thursday, was pretty much a glazing marathon painting the drape bowls, the inset bowls (to look like a flower or sun), the splatter painted hand, and the textured mug (3 color minimum).


Our last day, Friday, was reserved for exploring glazing techniques. The first project was a tie-dyed tile. We used pencil to draw shapes on the tile and then painted them with 3 or 4 colors. Once three layers of each color were applied, we put an extra coat of the lightest color around each boundary and dragged a fine brush through it making spikes of color. This was a pretty fun project…

Which is a good thing because the Mishimas technique we did next was a little more challenging. We had coated the slab plaques with three coats of glaze before painting the tiles. When the tiles were done, we used needle tools and fettling tools to scratch away line designs on the plaques. Keeping in mind that the glaze might melt and fill in the cracks, we had to scratch away a pretty thick line. Personally, I love Mishimas because it reminds me of scratch-art, which we do during the school year, so it’s easy for students to understand the concept. Once the plaques were complete, the last order of glazing were these simply adorable teeny tiny bisque mice. They were so cute they stole our hearts!

Throughout the week, near the end of the day, as some artists finished while others were still working, we held plastiline modeling clay challenges. This clay doesn’t ever dry so it can be used over and over again. Challenges included making the tallest tower that would stand independently for 30 seconds, crafting the longest coil noodle, and creating four-legged animal. This was a fun and often intense way to end the day – especially when the competition heated up! At stake? Starburst – two for the winner, one for everyone in the room. And don’t forget prestige!


In all, it was a fantastic week. Here is a little slideshow of some of the artists at work or pausing to smile for the camera:
As I look back at the week from my comfortable chair in a cool room, I will say it was hot and muggy on Monday and Tuesday. We took frequent water breaks and everyone tolerated the heat just fine. On Wednesday, Mr. Gentili brought in a big, giant fan that sounded like a jet engine when you walked by it. It moved a lot of air and helped us cool down tremendously. We were so cool, in fact, we decided to take a group picture:
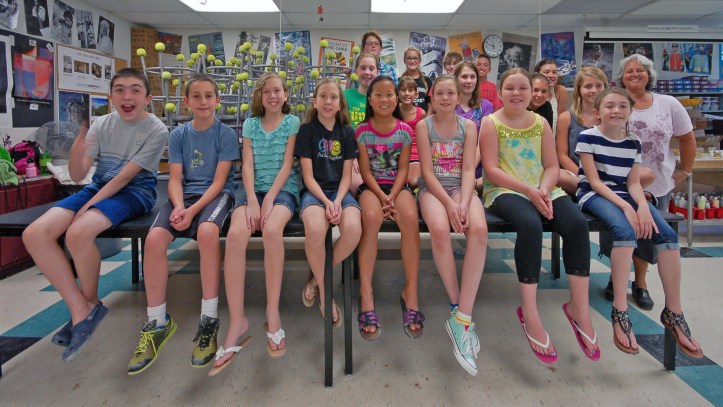
And then we just got goofy: 
And goofier still… (click on the photo to see the video):

Thank you for another terrific week of Clay Every Day! All the pottery will be fired before we return to school at the end of August. I promise to post photos of then of the amazing work these artists did.
Art teachers who may be reading this – every project except the manufactured bisque items are single fire projects. The items are hand built at about 1/4 inch thick. We let them dry a day or two and then glazed right over the greenware. An important asset to this process is setting them on squares of cardboard so the clay is touched by nothing but the brush. As you know, greenware is fragile and will crack under even the slightest pressure. Holding the pieces by the cardboard helps a lot. My fingers are crossed, but I am feeling pretty good about the outcome, expecting minimal breakage. As I said, fingers crossed…:)
Amei!! Parabéns! <3
Fabulous! So how exactly did you have them dry before glazing? i have always bisque fired because of how fragile the greenware is.
So fragile! There’s a note at the bottom of the post about how we let everything dry on a small piece of corrugated cardboard and handled the cardboard rather than the clay pieces. This worked well. The only tenuous moments were in transferring the painted green ware pieces to the kiln without damaging them.
[…] clay classes for our school Enrichment program, as well as week-long summer clay workshops like Clay Every Day. So my relationship with clay is not new, but it has never been consistent. It is an ability I […]